Customer Support

Answers to Our Most Frequently Asked Questions

Choose a product or service category to scroll to the answers below.

Consult the glossary of terms for any words or phrases that is unfamiliar to you.  Check out the webinar and video library for additional resources.

Color Science + Color Theory

Color rendition, flare, constancy/inconstancy, and metamerism are descriptions of how objects’ apparent color evaluation, both visually and numerically, can change with a change in the conditions of evaluation. Read more here.

This paper summarize the general guidelines for measuring brightness in the paper industry

Each illuminant is defined for 2 standardized observers, which can be 2° or 10°. The angles are related to the different sizes of the observer’s field of view.

To learn more about Metamerism and its effects on color control, read this paper

To learn more about the color tolerance – listen to the webinar (session 4) or Or read this paper

These are standardized illuminants for florescent light. F2 is also named CWF (Cool White Florescent) and F11 is also known as TL84.

To learn more about the CIELAB – listen to the webinar (session 3) or Or read this paper

To learn more about the triplets of color – listen to the webinar (session 1) or read this paper

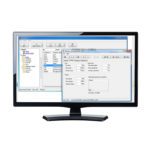
Computer monitor displaying Datacolor ToolsDatacolor

Tools

See Product Specifications

Turning off Lite Mode in Tools 2.X

  1. Go to the tab ‘System’ then select the 1st button ‘setup’ . When the ‘system setup’ menu appears. Uncheck the selection for ‘Lite Mode Enabled’. Then click ‘ok’. It will require closing in reopening Tools to take effect.
  2. Sometimes it does not work the first time so try the same procedure again and should work.
  3. You will know lite mode is off when you do not see the arrow below the desktop explorer section in Tools.

See attached screen shots.

Turn on Autoscale in Tools color Difference Plots

Go to the Tab ‘System’ then click on the first small icon (Plot Defaults). Then choose the ‘Color Difference’ tab. From there you can choose the scaling to a fixed amount or autoscale (Autoscale will adjust the graph to fit a batches on the graph)

Reconnect or reset instrument in DatacolorTools

If the calibrate button is not working it may be the instrument has lost connection. In Datacolor Tools go to the tab ‘instrument’ at the top. The click on the button ‘setup’(second from the left). There will be a drop down on this page. Click on it and select your instrument. If it says sim2000. That is incorrect. Select yours from the drop down and see if it connects.

Some specifier and user security settings can make button bars uneditable.

1) Using Windows Explorer locate the files: TOPBAR.CNF and BOTBAR.CNF

2) Right click on each. Select “properties” and ensure the “Read Only” attribute box is unchecked.

3) Verify that the current windows user has permission to read and edit files in the containing folder(s).
Restart Datacolor Tools / ColorTools

On the instrument menu, select Calibrate. Then, enter a number based on hours, in the box, Calibration Time Interval. The default is 8 hours. This is the recommended maximum setting.

Contrast Ratio is a mathematical measurement tool used to set a numerical value to a sample’s level of translucency up to the level of opacity. See attached for details.

You will click on the ’Search’ button on the ribbon bar in Tools. Then on the search page under ’sample type’ choose ’CSI Color Wall’. The option ’update CSI library’ button will be available. Click it and browse to the proper file on cd or elsewhere. The file name will have the extension .qtx_enc i.e. colorwall.qtx_enc . See file for details.

Tools has a search utility which can be used to help you identify measurements stored in its database which are colorimetrically close to a new color standard. You can set the parameters of this search. The Search option will return measurement names and their measurements so that you might then put them on the Tools desktop to further evaluate them against the new standard.

You must train the batches to a standard by marking them as ’Pass’, ’Fail’ or ’Exclude’. Then use the function ’A.I. Pass fail training’. Please see attached pdf for more detail.

Go to System Menu, select Plot Defaults and Type of plot and Click on Enable Print Names/Labels

Labels are not available for Trend and Histogram plots.

Select the Down Arrow key next to “STD:INST” or BAT:INST” button and select “Instrument Average”. Go to “Std” in Menu bar – File – Standard Defaults – From down arrow list for Instrument condition, select “Instrument Avg” and click OK. Follow the same procedure for Batch measurement default also, on the Bat menu bar.

You can use the command button, “Retrieve sample as Std”. Or, go to the menu option, Std, File, Retrieve Sample.

Showing different Colibri Software ComponentsDatacolor

Colibri Platform

Learn more

Solution integration services, includes the development of custom plugins and the connection of the Colibri® platform to hardware (spectrophotometers, balances or weighing equipment) and 3rd party systems. such as Enterprise Resource Planning (ERP), Management Information Systems (MIS) and Laboratory Information Systems (LIMS).

The Plugin for Adobe Illustrator extends the scope of the Colibri® software to cover the design stage of color management and communication. Suitable for both creative and pre-press designers, it enables real color selection with unique Colibri® spectral color data for use in designs.
Custom Plugins are available for third party software on request. Contact our Sales Team for more information.

Colibri® ColorQuality enables manufacturers and suppliers to manage and monitor the color of products produced.

Colibri® ColorTint is designed to control the dispensing of color products on tinting machines, whether you are handling; a new order or a repeat, correcting a color or completing an order.

Colibri® ColorMatch enables recipe calculation on different substrates and ensures accurate matching of opaque, translucent and transparent colors as well as of metallic effects.

Colibri® ColorSpec enables creative and prepress designers, brand owners, manufacturers and material producers to use real colors in their artworks, to define color standards for their products, and to communicate brands and designs to their suppliers.

Please contact our Support Team for detailed information.

The Expert System is a powerful feature, which enables the user to guide the software in the formulation selection. Colibri® calculates formulations based on optical data. The expert system allows the user to add other product/ process requirements to the calculation process, such as cost, heat resistance or light fastness etc

There are 4 types of Colibri® templates; Standard, Quality Control (QC), Color Matching and Report Templates.
By creating customized templates will help to simplify your daily work and at the same time increase productivity. For more information contact our Support Team.

Yes, this is possible.

Note: A Colibri® version can only connect to a database created with the same version. If the version is found to be older, you will be prompted to update to the same version.

No, this is usually not necessary. Within the same release (e.g. 3.8.6xxx) the Install Wizard will automatically uninstall the old build/ version.

You can execute both from the “Administration/Database Administration” window.
To back-up a database click on “Start” in the Backup window, then select a folder in which the .cbak file will be saved.
To restore a database; click on “Start” in the “Restore” window, the folder where the .cbak file has been saved will automatically open, then select the file.

Note: Only start the restore, if you want to overwrite the data in the database you are currently connected to.

autolab color vialsDatacolor

Dispensing + Dyeing

See Autolab Specifications

You must calibrate the water. Go to the calibrate icon and follow the steps.

Clean the water tanks and then cover the scale. Manually activate the valve with the problem, then add some air pressure. The idea is to get out the particles that are inside the valve.

Usually the shock absorber is broken or missing, so you must install a new one.

You must add some oil (just a little) directly to the belt.

You can back up Database by using DP software. Go to Utility and select Back up.

You have to select the folder where you need to keep the back up file.

Copy the Autolabtfdp.ini and Autolabtfctrl.ini file from C:\ALAB\ALTF\Control or DP respectively.

The Machine has an “up head sensor” if the pressure is low, the dispenser head doesn’t reach the right position.

Yes, but keep the following in mind:

The reference beaker will measure the temperature and is the temperature reference for all other beakers. You can fill it with water, but after a period of time, the water volume will reduce and also the measured temperature in this beaker will change and influence all others.

Some choose to always leave it in the unit because they are afraid to damage it. With older units, the PT100 sensor has an electrical contact at the end and this contact may not be cleaned with water!

The newer units (Ahiba IR) have a bayonet PT100 and this can be cleaned with water.

No, you may not mix them. In fact, it can create dangerous situations! The latest range of Ahiba dyeing beakers are made of polished Stainless Steel (SS). The Black Coated beakers will heat up faster than the SS beakers. So, if you mix them, you may risk those beakers will open when heating up to high temperatures. For example, if the reference beaker is a SS version and the set temperature is 130 8 C, the black coated beaker can have a temperature of 150 C, the black coated beaker can have a temperature of > 8 C or higher. This will result in a high built-up pressure (depending on the amount of liquor) and can open the lid.

Check the following:

1. Check whether all the program parameters are the same. (gradient, speed, …)

Be careful when programming 0.0 8 C as gradient! This means that the system will heat at maximum power. When programmed like this, different heating behavior can be normal. It will be dependent on lamp efficiency, lamp aging, interior cleaning, etc… It is then better to program 4.0 8 C/minute instead of 0.0 8 C. The controller will then monitor the real temperature in the unit.

2. Are you using the same beaker size?

3. Are you missing stainless steel and black coated beakers?

4. Do the reference beakers have the same content (liquor ratio, sample weight, …)?

Possible cause:

The fan outlet at the back of the unit is blocked. These types of units are cooling air controlled. At the back of the unit, there is hot air exhaust, and it must be at least 6 inches away from the wall or obstacles.

Possible causes:

  1. The additional installed water filter is clogged, or the water filter at the back of the unit is clogged.
  2. The internal water-cooling radiator (heat exchanger) is clogged by water calcium. If this is the case, then the heat exchanger needs to be replaced by Datacolor service personnel.
  3. The water supply is closed, and the machine is cooling down only by air.

Pigment Formulation Software: Match PigmentDatacolor

Match Pigment Software

See Product Specifications

Concentrate scaling is a mathematical alteration of a formula to bring its colorant loading from its target level in a finished product to a formula for a material that is highly loaded that can then be used to mix with uncolored material to make a final product that is colored at the desired level. See more in this document

Keywords are a tool used to identify key properties of the materials you need to choose among when you are formulating to a new color standard. Keywords will help the user identify which colorants/materials have those critical properties which are necessary in color match. This is most useful when the number of colorant choices in your colorant sets are vast, and the knowledge of all those materials’ critical properties are not shared by all users. See more in this document.

Datacolor includes the capability to selectively limit a user’s access to the data management functions. This feature was created to protect proprietary color data, such as standard measurements and colorant data

This program enables you to create and edit Schedules, a super-queue tool which incorporate several job templates into a single queue. By considering multiple job templates, the Schedule feature automates the use of different templates (strategies) to achieve specific colorimetric and non-colorimetric requirements for the jobs in the queue. Please refer to the guide for more details.

When customer gets this error, it is normally due to one of two reasons:

1. The colorant was added to the database and was not calibrated. The colorant needs to be calibrated in order to be used in Formula Central.

2. In the Job Template, the colorant needs to be selected and the Job Template needs to be saved again. In this way, the colorant will be selected each time the user wants to use that Job Template.

Follow this instruction guide on XML import and export

Here are documents explain sample preparation guidelines for a Datacolor Match Pigment colorant database for Ink, Paint, and Cosmetics.

Background:

Most Datacolor Instruments allow selection from multiple options:

1 Specular Included (SCI or INCL or Include) measures all the light reflected from a sample

2 Specular Excluded (SCE or EXCL or Exclude) avoids light reflected directly off the surface of a sample (Glossier samples will measure darker…)

Since there is no reliable method of converting measurements between these two conditions, the program will not allow measurements of different types to be used together in a single match job. See the Datacolor MATCH PIGMENT User Guide glossary for more discussion and definitions.


If you are seeing this warning message:

You have attempted an operation mixing incompatible measurements.

Your colorant set is measured using one condition (usually “Include”) and the Target, Trial or Substrate measurement(s) is made using another.

This could come from using measurements from two or more instruments with different designs.
Usually, the cause is inadvertently mixing samples measured with different SPECULAR settings on a single instrument.


To resolve this issue, calibrate your spectrophotometer and examine the upper left corner of the calibration conditions window.

You will likely find the default setting is changed from “Include” to “Exclude”

Correctly setting the instrument to the same condition as your colorant set measurements (usually “Include”) and measuring the offending sample again will resolve the problem.

Datacolor Match Pigment can exchange data with other software packages. For step by step information please refer to the instruction document.

person using the match textile software on their computer screenDatacolor

Match Textile Software

See Product Specifications

From the recipe explorer view click on the recipe you would like to correct and press the Lab Correction button in the Tool bar or press F6

Follow these step-by-step guide

Right Click on the spectro icon and choose ’input form’.

See detailed instructions.

Go to the TOOLS menu and click Import or Export.

Read “Import and Export from Match Textile” for more information.

Both Datacolor Match Pigment and Datacolor Match Textile use the Sybase Adaptive Server database management system.

The attached document will explain the different methods that can be used to back up the database.

  • From the main screen Click on the button Dyeprocess
  • You will come into an ‘explorer’ type screen
  • Double Click on the right-hand side or right click and choose
  • Dyeprocess.

Follow these step-by-step information

From the main menu press the “recipe” button and use the following options

  • Match a new standard button in the Tool bar
  • F5
  • Right Click and select Match Option

Follow these step-by-step instructions.

  1. Create a Quality/Style.
  2. Measure in your primaries as color samples.
  3. Create dyestuff names.
  4. Create a dyeprocess.
  5. Create a dyeset.
  6. Add dyes to the dyeset.
  7. Calibrate the dyeings

Follow the step by step information

Click on the button ‘sample’ from the main Datacolor Match Textile shell.

Right click on the right-hand side of the sample window and choose sample from the drop-down list. Follow step-by-step information.

Follow the guide for sample preparation best practices using Match Textile.

Select the task ‘New’ from the menu ‘Colorant set’ and select the colorant set type you would like to create. Follow the step-by-step information.

Go to the TOOLS menu and click Import or Export.

Download these instructions to import and export from match textile for more information.

example screenshot of process software on computer screenDatacolor

Process + Weigh Software

See Process Specifications ›  |  See Weigh Specifications ›

The attached document contains the Mettler scale SICS communications protocol and how to test the scale using the HyperTerminal program.

See attached document for the list of scales supported in Datacolor Weigh software.

Datacolor Process uses a set of local look up tables to speed up the opening of screens. Occasionally these sets of look up tables can become corrupted slowing the software and so need resetting. Follow the procedure in the attached document to reset the tables.

Follow the instructions in the attached procedure.

In Job ticket, it is not possible to change the volume in Operation. But it is possible to introduce a factor in the Recipe Template call-off.

The call-off volume will be equal to the dyelot volume multiplied by this factor. See attached document.

The quantities of dyestuffs must be modified following rules that are specific to each dyestuff. In this example, the adaptation depends on the liquor ratio, but it can be adapted to other variables.

The attached document has been written for Datacolor Process v.2.1. Since Datacolor Process 2.2, it is possible to add parameters to each dyestuff record and even formulas (see IP2 TN011 – Quantity related to each dye.doc). With this new feature, you can simplify the following procedure by including the dyestuff factor calculation directly in the dyestuff record.

In Datacolor Process or ITMProcess, it is not possible to create a dyelot that uses two or more machines at the same time. You have to create a virtual machine that has the total volume of the machines you want to couple. See attached document.

“select * from Dyelot where dyelot_Id like ’%45%’ order by dyelot_id”

Units cannot be selected by a formula but, however, it is possible to introduce rules to select units.

Problem:

Dyes quantities less than 10g must be expressed as a volume of a stock solution at 100% or 10%.

Solution:

As formulas cannot be introduced to select a unit, we will introduce in the dye operation two dyes lines, one with a unit expressed as a volume and the other with a unit expressed as a weight.

To avoid from displaying twice a dye (one time for each unit), we will introduce a formula that sets quantity to zero when the unit is the wrong one. As the dyes quantities should not be definitively modified by these formulas, formulas will be set as ‘display only’.

See attached document.

Use the function ChangePickup

example: IN CASE OF… THEN ChangePickup(ValueOf(’Newvolume’))

This report is useful to check the information you introduce in dyestuffs, in tab ’Dyestuff’ tables ’Parameters’ and ’Auxiliaries’. See attached document.

See attached document for procedure.

General Software Questions

Check this list to see if your instruments are supported. If you have any questions, please contact your local support team.

Please follow these instructions to locate your license information for Match Pigment Current Release (4.x), Or Match Pigment Legacy Releases, and Tools.

You may validate your software license after your initial installation of the software on this validation portal. After first validation, you will need to call support for future validations.

Retail POS

Custom Matches can now be given a color name and description if wanted. Please follow these instructions to create customer files/job descriptions.

Please follow this instruction to set up your paint line database.

Please follow this instruction to set up your Dymo Printer.

Backing up your customer files is important and easy to do. Please follow these instructions.

Make sure all manufactures are turned on/selected in the Paint 2 configuration menu.

Be sure both User Name and Password are ADMIN

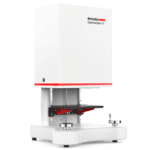
horizontal SpectraVision product with new logo on frontvertical SpectraVision product sideviewSpectraVision + Tools SV

See SpectraVision Specifications

We recommend single layer for multi-color materials to avoid color overlapping

No. The IP address is fixed at 192.168.111.11

It is not possible to provide average readings in v2.5 (current release) of the software.

If you are doing on-screen evaluations, we recommend you calibrate your monitor using a Spyder 5

All light sources available in the current TOOLS 2.3 shipping version will be available. However, only two light sources will be supported in the color patch at a time

Currently the use of collections is limited to TOOLS SV 2.5.

Some best practices methods have been determined and are included at the end of the what’s new document for TOOLS SV 2.5

SpectraVision takes approximately 35 seconds to measure one sample but can measure multiple colors at once, providing a reflectance curve for each color. Datacolor 1000 family is faster but can only measure one color at a time.

Yes. calibration and measurements work the same way as regular Datacolor TOOLS.

Yes, after the colors have been separated with SpectraVision, export the data to a QTX file and proceed to match the colors in Match Textile

Utilizing the sample holder, you can fold the material and secure it so that multiple colors are visible in the aperture plate. You may also use the “add” button in the select color separation screen to add additional colors that may be on other parts of the sample that are not visible with a single measurement.

Image capture, reflectance, and colorimetric data, metamerism and others

Reconnect or reset instrument in DatacolorTools

If the calibrate button is not working it may be the instrument has lost connection. In Datacolor Tools go to the tab ‘instrument’ at the top. The click on the button ‘setup’(second from the left). There will be a drop down on this page. Click on it and select your instrument. If it says sim2000. That is incorrect. Select yours from the drop down and see if it connects.

Status code ’00211’ is an indicator that the green tile result is high. This is an indicator that the instrument has a problem or if it is a loaner or recently serviced instrument the green tile data needs to be deleted and reset.
The LCD Status Display includes a color coded (green, yellow, red) Instrument Status bar. Normally, this bar will be green in color and the Status Codes field will be blank. Certain conditions, including the ones listed below, may cause the Instrument Status bar to be yellow or red in color. Corresponding Status Codes will also be displayed. Should these conditions occur, please contact your local Datacolor office for more information and guidance regarding next steps.

Item Condition Code and Color
Age of White Tile

(Replacement recommended yearly)

10-12 months old 00111; Yellow
> 12 months old 00121; Red

Control Measurements

(Taken during Calibration)

dE > .5 for a given set of measurement conditions. 00212; Red
.5 >= dE >= .35 for a given set of measurement conditions. 00211; Yellow
Time since last Maintenance and Certification > 12 months 00311; Yellow

Inter-instrument agreement refers to how close two or more color measurement instruments (spectrophotometers) of similar model read the same color. Read all about it here: Why should you care about Inter-Instrument Agreement? | Datacolor

Check that the black trap is clean and well positioned.
Check that the Checkbox Autozoom is ticked in the calibration window. When the Autozoom is not ticked, the instrument does not recognize the aperture and if the user changes it, the instrument will not focus on the hole. This will give an error.

Any sophisticated piece of equipment requires routine maintenance and specific conditions to perform at its optimal level. Read this guide Spectrophotometer Best Practices for Accurate Measurements | Datacolor and download the paper for more detailed information.

To provide accurate data, your spectrophotometer needs to be well-maintained. This includes calibrating it daily, at the start of a shift, or before beginning any important measurement job. Here’s what you need to know about calibration tiles: How to Store, Use and Clean Your Calibration Tiles | Datacolor

Please follow this instructions to install new calibration data for older instruments.

If you have a failure on the green tile, then please check the following items.

  1. Clean the green tile with a soft paper tissue
  2. Check the green tile for scratches.
  3. Clean also the white tile with a soft paper tissue.
  4. Check on the calibration screen of the software which aperture is selected.
  5. Now verify that the same aperture is on the instrument.
  6. If that is correct recalibrate the instrument.
  7. If you still have a failure, call your Datacolor representative

This means your unit has lost the calibration file, and you need to follow these instructions to install new calibration data. This only applies to older instruments as all of our white tile data is now stored on the instrument firmware.

The attached document should lead a user through more details about the terminology, determination, and limitations of such whiteness indices and material standards

Cause: The instrument does not communicate with the PC, the instrument goes automatically on Simulus mode.

Solutions: Check the cable, Restart the instrument, and check your instrument configuration and calibration (Page 3 of the Tools Quick Start Guide).

If not fixed, contact your Datacolor local support.

This error is caused by never Hot-Syncing a Check unit to a computer. To bypass a Hot Sync to a computer, there is a function on the Check called: Purge All Deleted.
This option is on the Check’s Help menu. If you have been deleting unneeded samples all the time, but the unit was never hot-synced to a PC, the ’deleted’ samples are not permanently removed from memory. The Purge function completely removes them from memory. On the Datacolor menu, tap on upper left corner, then tap on Help, Purge All deleted.

Woman talking on phone

Bring Ideas to Life with Color Management

When data meets color, inspiration meets results.

More
This site is registered on wpml.org as a development site. Switch to a production site key to remove this banner.